第10堂課
畫出垂直懸掛的彈簧
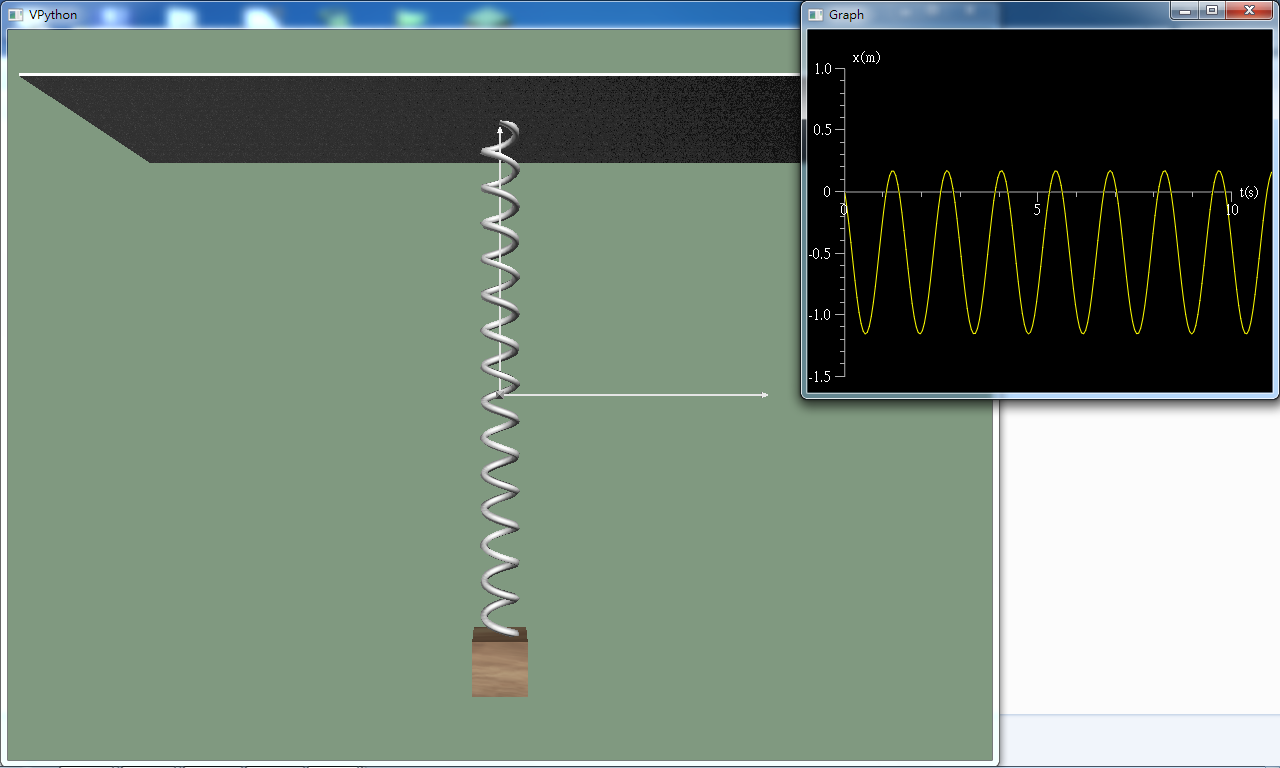
1 2 3 4 5 6 7 8 9 10 11 12 13 14 15 16 17 18 19 20 21 22 23 24 25 26 27 28 29 30 31 32 33 34 35 36 37 38 39 40 41 42 43 44 45 46 47 48 49 50 51 52 53 54 55 56 57 58 59 60 61 | # -*- coding: utf8 -*-
# 匯入視覺化套件
from vpython import *
# 1. 參數設定
# 重力加速度
g = vector(0, -9.8, 0)
# 木塊質量 0.5 kg
m = 0.5
# 彈簧的彈性性數 10 N/m
k = 10.0
# 時間間隔
dt = 0.001
# 經過時間
t = 0
# 2. 畫面設定
# 畫布
scene = canvas(width=800, height=600, background=vector(0.5,0.6,0.5))
# 位置圖
gd1 = graph(xtitle='t(s)', ytitle='y(m)', ymax=1, xmax=10, ymin=-1.5)
tx = gcurve(graph=gd1, color=color.yellow)
# x軸箭頭
x_axis = arrow(axis=vector(1, 0, 0), shaftwidth=0.01)
# y軸箭頭
y_axis = arrow(axis=vector(0, 1, 0), shaftwidth=0.01)
# z軸箭頭
z_axis = arrow(axis=vector(0, 0, 1), shaftwidth=0.01)
# 天花板
ceiling = box(length=3, height=0.01, width=1, texture=textures.stucco)
# 木塊
square = box(length=0.2, height=0.2, width=0.2, texture=textures.wood)
# 彈簧
spring = helix(radius=0.06, coils=15, thickness = 0.03)
# 設定天花板位置
ceiling.pos = vector(0, 1, 0)
# 設定木塊位置
square.pos = vector(0,0,0)
# 設定木塊初速
square.v = vector(0, -2, 0)
# 設定彈簧位置
spring.pos = ceiling.pos
# 設定彈簧軸線(長度)
spring.axis = square.pos - spring.pos
# 設定彈簧原長
spring.L = spring.length
# 3. 運動部分
while True:
rate(1000)
#彈簧的加速度 a= ( k / m ) * 彈簧的伸長量 * 彈簧的反方向 + 重力加速度
square.a = -(k/m)*(spring.length-spring.L) * spring.axis.norm() + g
square.v = square.v + square.a*dt
square.pos = square.pos + square.v*dt
#更新彈簧的長度
spring.axis = square.pos-spring.pos
# 畫出y軸位置圖
t = t + dt
tx.plot(pos=(t, square.pos.y))
|
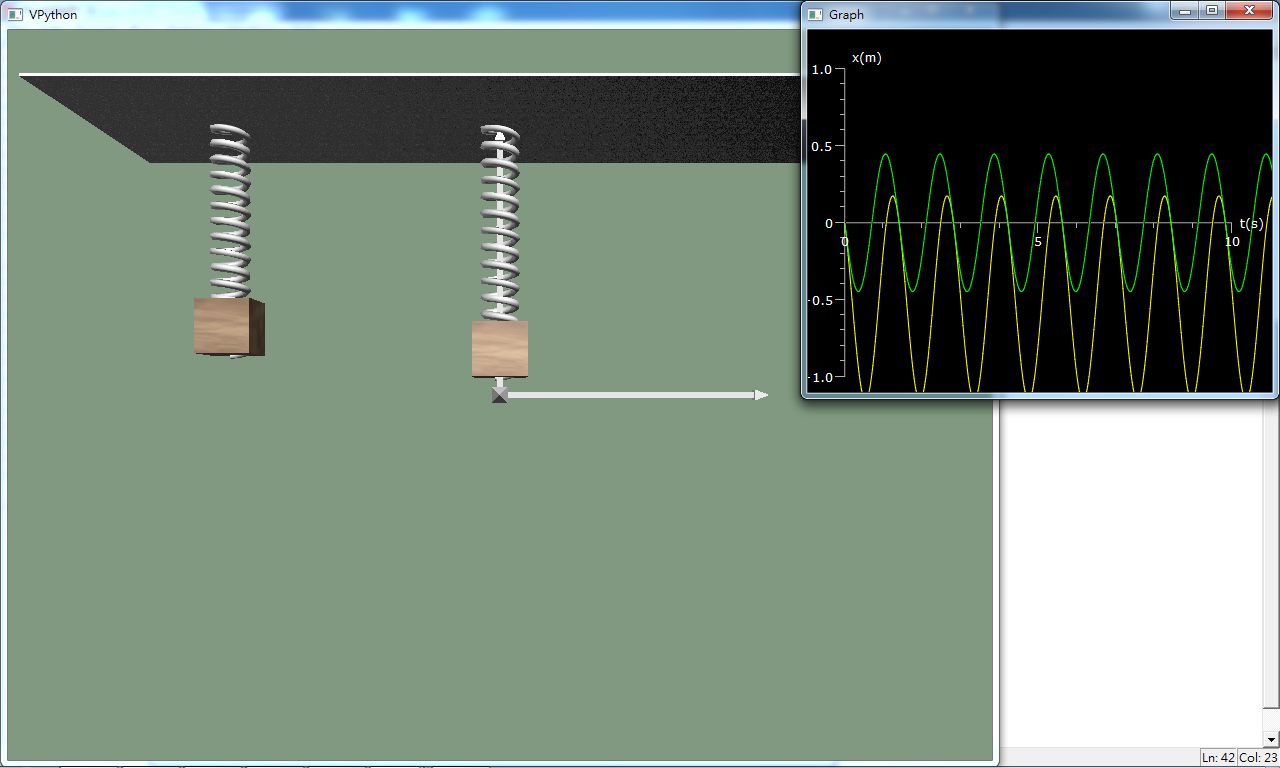
作業:
另外畫出一個沒有受重力影響的彈簧並畫出其時間位置圖。
本單元課程自2018.7.5日起已被瀏覽 505 次