第1堂課
第一個程式
1 2 3 4 5 6 7 8 | # -*- coding: utf8 -*-
# 匯入視覺化套件
from vpython import *
#產生一個寬400像素,高400像素的3度空間以進行繪圖
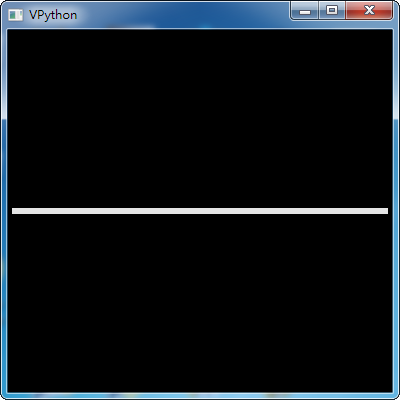
scene = canvas(width=400, height=400)
#產生一個扁長形方塊,當做是地板
floor = box(pos=vector(0,0,0), length=0.3, height=0.005, width=0.1)
|
第6行程式會開一個專屬視窗,並以 scene 為名字,代表此視窗,而視窗在開啟時,右方為模擬世界中的+x 軸、向上為+y 軸、射出紙面為+z 軸。width 與 height 是視窗的寬與高,單位是顯示器的像素。
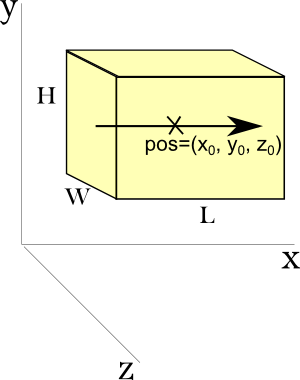
第8行程式會產生一個 box 物件,在視窗中畫一個非常扁平的 box,代表地板,取名為 floor。length, height, width 為長(平行 x 軸)、高(y 軸)、寬(z 軸)
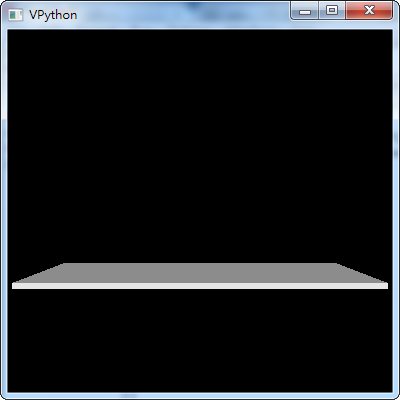
上圖看起來不像是立體空間,反而像是一張平面圖,所以我們試著設定一下視角的中心點,調整一下Y軸。
1 | scene = canvas(width=400, height=400, center=vector(0,0.06,0))
|
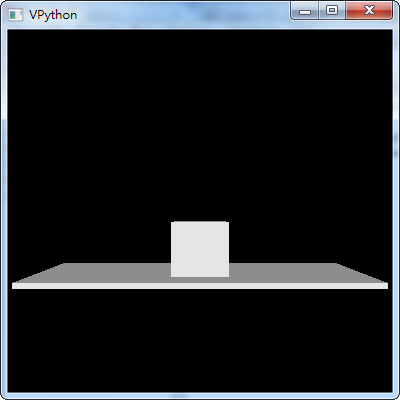
有了畫布,有了參考地板,接著我們來產生一個正立方物體
1 2 3 4 5 6 7 8 9 10 | # -*- coding: utf8 -*-
# 匯入視覺化套件
from vpython import *
#產生一個寬400像素,高400像素的3度空間以進行繪圖
scene = canvas(width=400, height=400, center=vector(0,0.06,0))
#產生一個扁長形方塊,當做是地板
floor = box(pos=vector(0,0,0), length=0.3, height=0.005, width=0.1)
#產生一個正立方物體
cube = box(pos=vector(0, 0, 0), length=0.05, height=0.05, width=0.05)
|
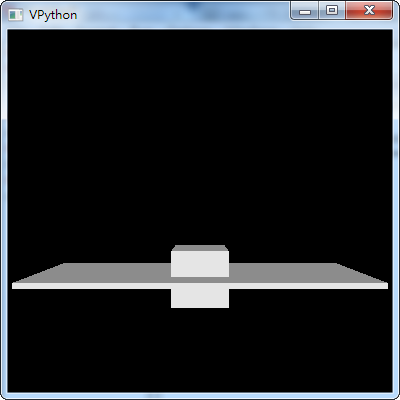
由於這個物體的中心點與參考地板的中心點重疊,所以看起來它是沈入地板,我們要將它的位置上移半個物體高。
1 | cube = box(pos=vector(0, 0.05/2, 0), length=0.05, height=0.05, width=0.05)
|
有了這個物體,接著我們可以寫個程式讓這個物體動起來(改變它的X座標)
1 2 3 4 5 6 7 8 9 10 11 12 13 14 15 | # -*- coding: utf8 -*-
# 匯入視覺化套件
from vpython import *
#產生一個寬400像素,高400像素的3度空間以進行繪圖
scene = canvas(width=400, height=400, center=vector(0,0.06,0))
#產生一個扁長形方塊,當做是地板
floor = box(pos=vector(0,0,0), length=0.3, height=0.005, width=0.1)
#產生一個正立方物體
cube = box(pos=vector(0, 0.05/2, 0), length=0.05, height=0.05, width=0.05)
#讓物體運動
while cube.pos.x < 0.1:
rate(100)
cube.pos.x = cube.pos.x + 0.001
|
作業(1):讓方塊先往右移動到0.1的位置,再往左移動到-0.1的位置
作業(2):讓方塊能夠繞著地板的邊邊繞一圈。
本單元課程自2018.7.5日起已被瀏覽 1447 次